How to quote Linux Warehouse
How to quote Linux Warehouse
Step 1: Create new Opportunity by clicking on New Opp

Step 2: Check if Company is loaded and has a contact loaded as well.
Add partner, then contact person and complete the description box with a short description of the opportunity. Click save and the opportunity will be created. Check Territory – Should not say WW

Step 3: Click on Quote.

Step 4: the below screen will pop up then click on new.

Step 5:
- Brand: as RedHat, Zimbra, Suse
- Description: a brief description of the product you are quoting on.
- End User: Search and choose correct end user (if not available use TBC (To Be Confirmed)
- End User Country: Select End User Country
- Type: Run rate, Project or Tender

- ROE: Put 1 if quoting outside the country and put current ROE+30c if its SA.

- Then click next.

Step 6:
- Once you have clicked on Next, the below page will appear.
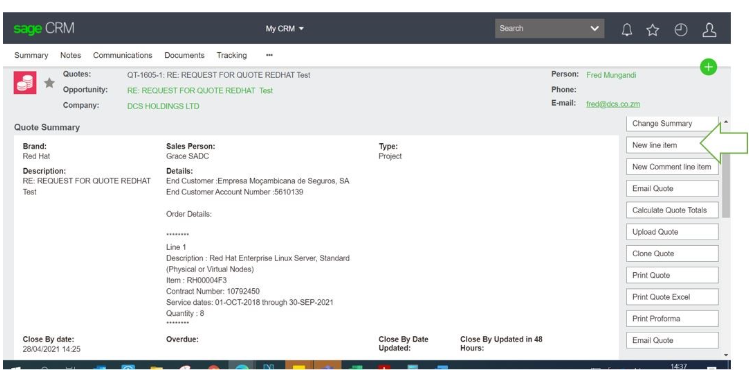
- Click New line item.
- Create your line item/s, select New Line item
- Search for the Part required.
- Use the % key in front of the Part Number.
- The part will populate the price.
- Put in your Quantities.
- The price on system has discounts included already.
- If the SS requested additional discount include it on the discount on top tab.
- Put in New or Renewal under Contract tab
- If it is a renewal put in the contract number supplied by the vendor.
- Input Start and End date as per renewal terms.

- Click save to proceed with quote calculation or save & new if multiple line items are required, repeat Step 5 for multiple line items on quote.
Step 6:
- Once quote is correctly populated, select Calculate Quote Totals to calculate your margin and Total amount, as well as the GP and Margin %
- Double check that the above has totalled correctly.

Step 7:
- Check if the correct discounts pulled according to the Partner Classification.
- Click accept if all is good to go.

- Add tracking note and click save

- Once completed, it will take you back to the Quote page and the quote will go into the New Quote stage.
- Put into the Identified stage and add a tracking note.

- Once completed, it will take you back to the Quote page and the quote will go into the Identified stage.
- In order to generate the quote to client and/or to sales, click on the print quote button.

- Click on the Quote link to open the quote.
- Check if everything has been pulled correctly and the totals are correct.
- Then save it to your appropriate folder and send it to sales/client.