DELL CRM, Quote Process
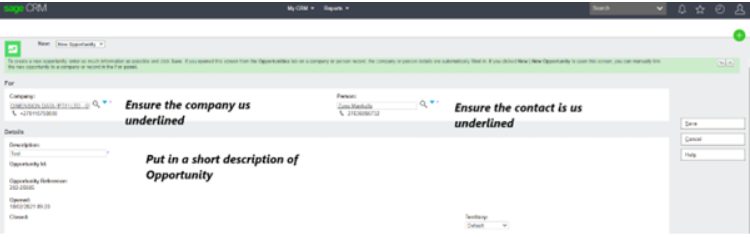
Step 1: Create a new Opportunity


Step 2: Check if the partner is onboarded and has a contact loaded.
Add partner then contact person and complete the description box with a short description of the opportunity e.g., EU Name_Dell R940.
Territory stays on Default. Once save has been clicked an opportunity has been created. Ensure the territory updated correctly (should not say worldwide)
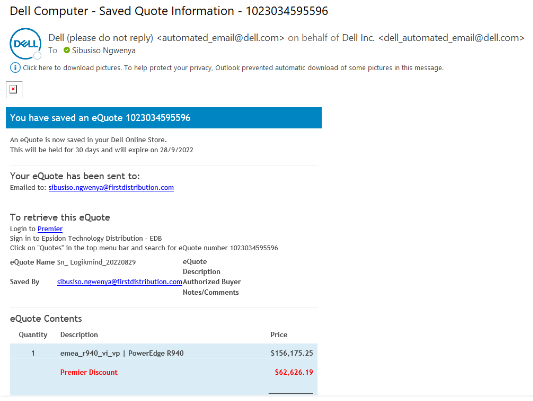
Dell’s quote comes in 3 formats Excel Email
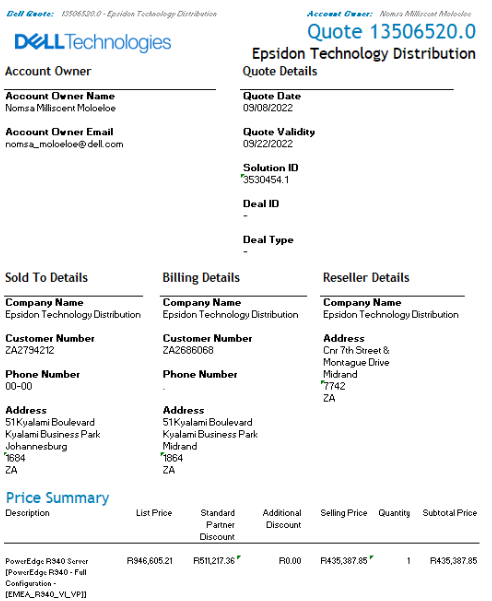
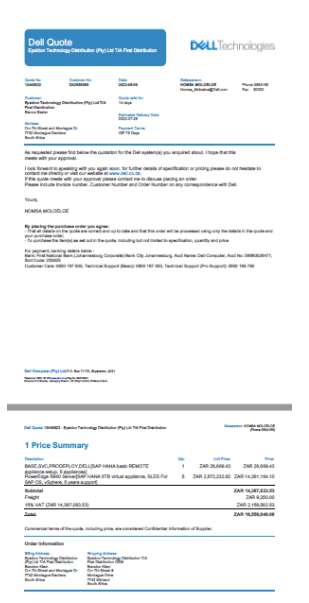
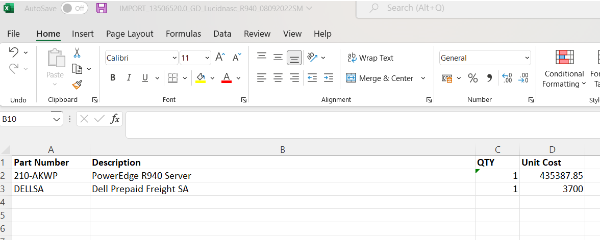
Step 3: Export the Cart onto the CRM DELLEMC Template. Ensure no value items has 0 in the unit cost column
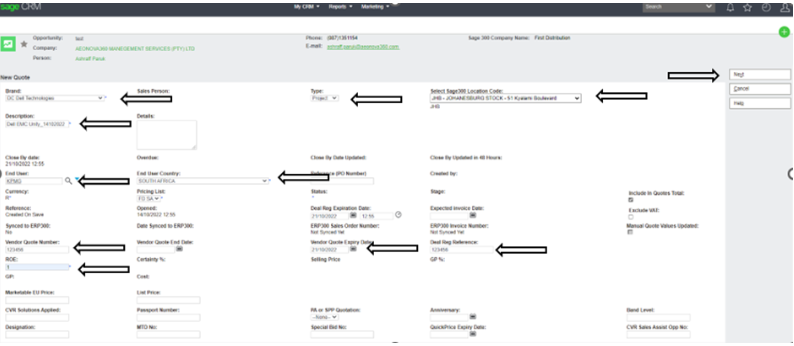
Step 4: Click on new quote.

Step 5:
- Brand: as DC Dell Technologies
- Description: what you are quoting
- End User: Search and choose the correct end user (if not available use TBC (To Be Confirmed) Once the EU has been found ensure the EU name is underlined in order for CRM to select it.
- Vendor Quote Number: Put in Dell Cart number
- ROE: Always 1
- End User Country: Select the correct country
- Add Vendor Quote Expiry Date as per quote received from Dell
- Type: If not a known tender choose Project
- Chose JHB as the Location
- Deal Reg Reference: Always put in if non applicable put N
- Excluding VAT: Only tick the box when the partner is not in SA
- Click next
Step 6:
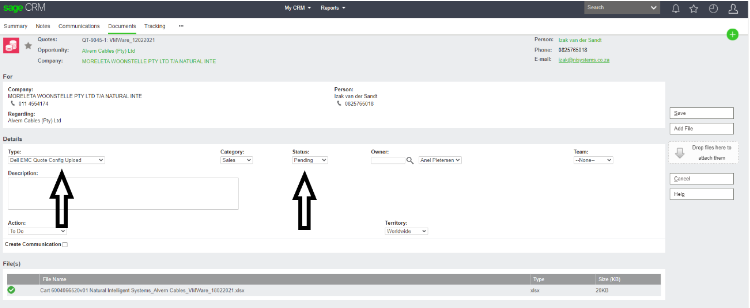
- Click on Documents
- Add file, import the converted cart to template file
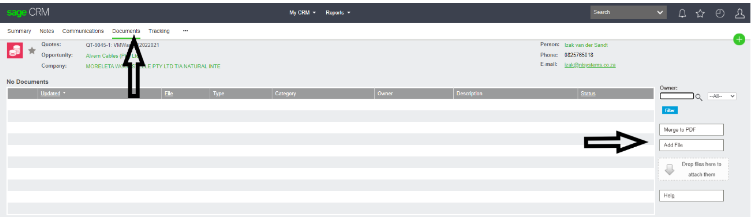
- Change the type to Dell EMC Quote Config Upload and
- Status to Pending
- Click save
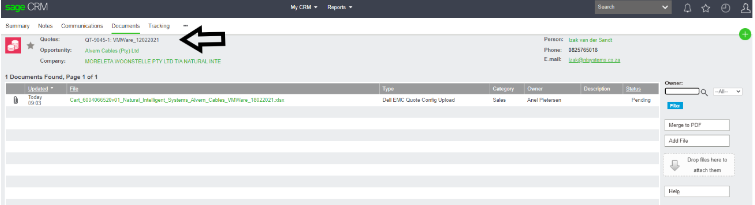
Go back to the quote by clicking on the quote number
Step 7:
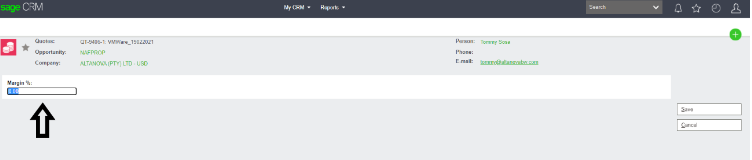
- Click on import quote config

- Add Margin, click save
- Ensure all codes are imported

- If codes are not imported, click on the new line Item
Search in the search box with % in front of the code.
If the code is on CRM and value is applicable put value in USD Custom list price put in quantity and margin tick the exclude system margin box and click save.

If the code is not on CRM send it off to Create Code create.code@firstdistribution.com with the below import file completed

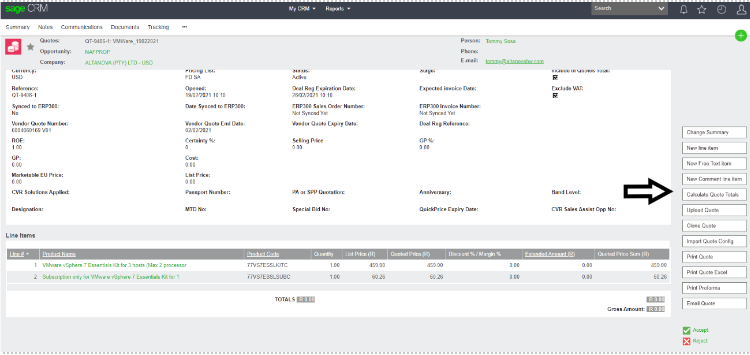
Step 8:
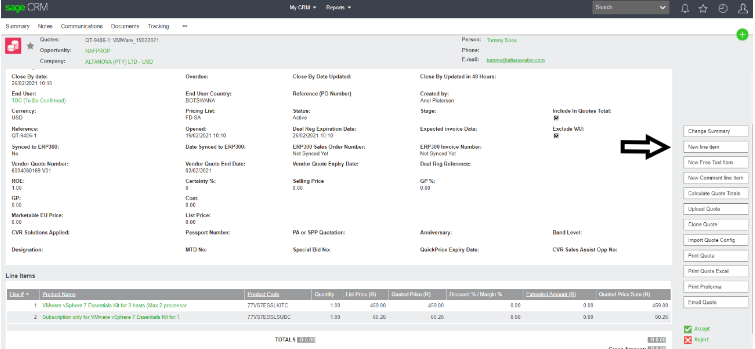
- Click on calculate quote totals
- Once calculated double check that it calculated correctly
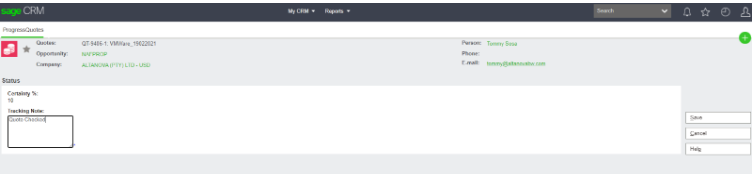
Step 9:
- Once checked click on accept
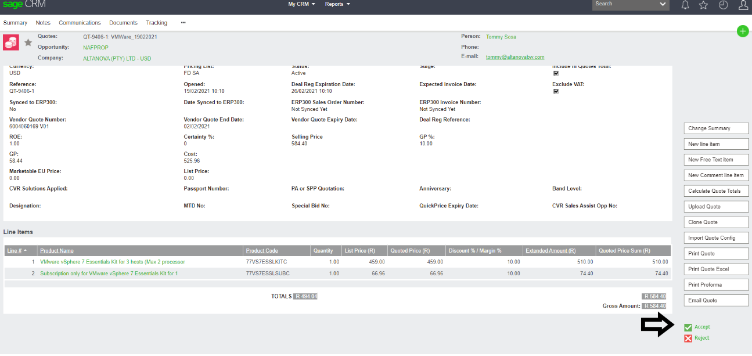
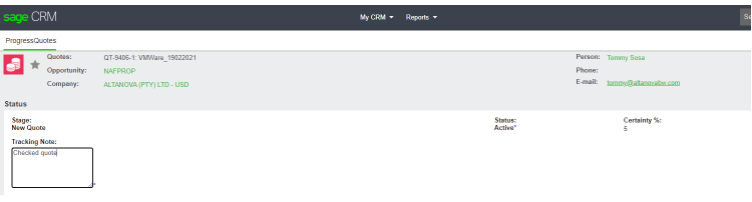
Put in tracking notes, click save
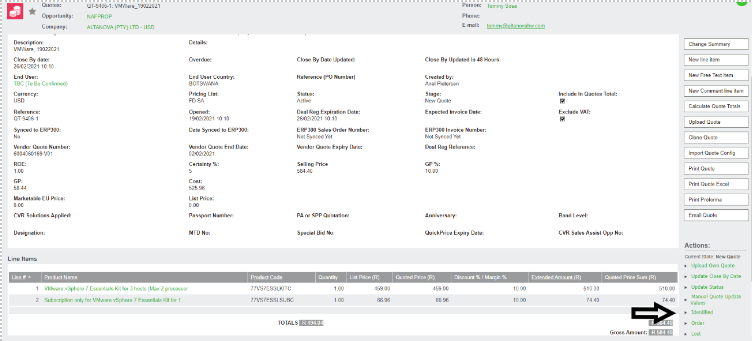
Step 10:
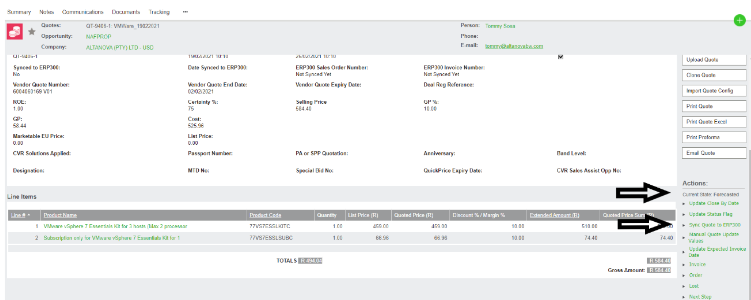
- Click on Identified
- It is important to put on Identified or the salesperson will not see the opportunity.
Put in tacking notes, click save
Step 11:
Print quote
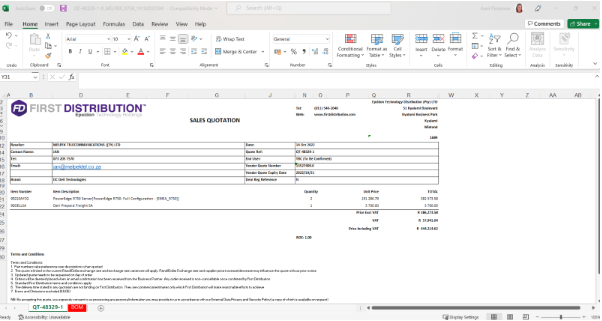
- Can be printed in PDF (Print quote) Or Excel (Print Quote Excel)
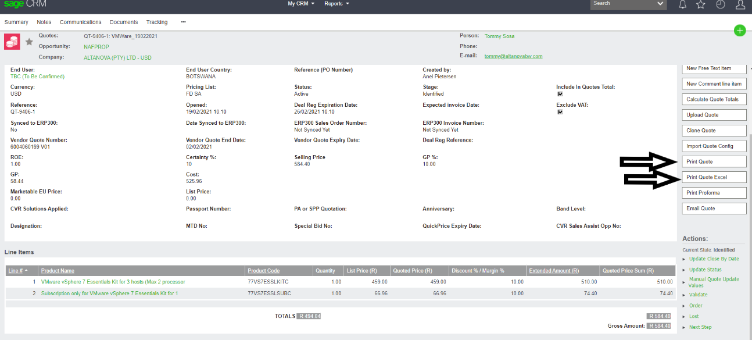
- Add the Components to the 2nd sheet, Save file in folder and send to partner / salesperson.
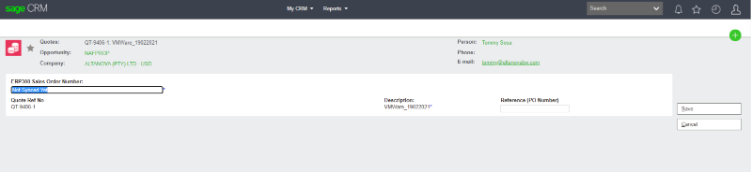
Step 12: Placing the order
- 1st the salesperson must put quote on Forecast.
- Click on ERP300
- Put in SO Number (ERP300 Sales Order Number is your ACCPAC SO number)
- Put in partner PO Number (Reference (PO Number)