FD NEW CRM USER MANUAL
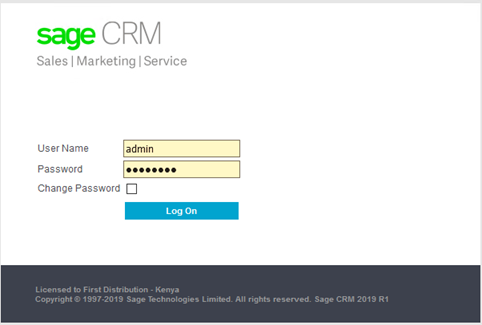
1. Login to CRM
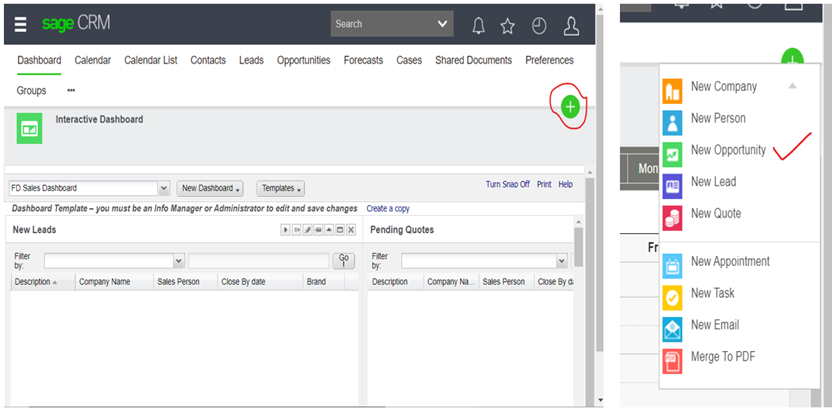
2. Create a new Opportunity
Click on the green plus sign in the right-hand corner and select new Opportunity
3. Complete Opportunity details
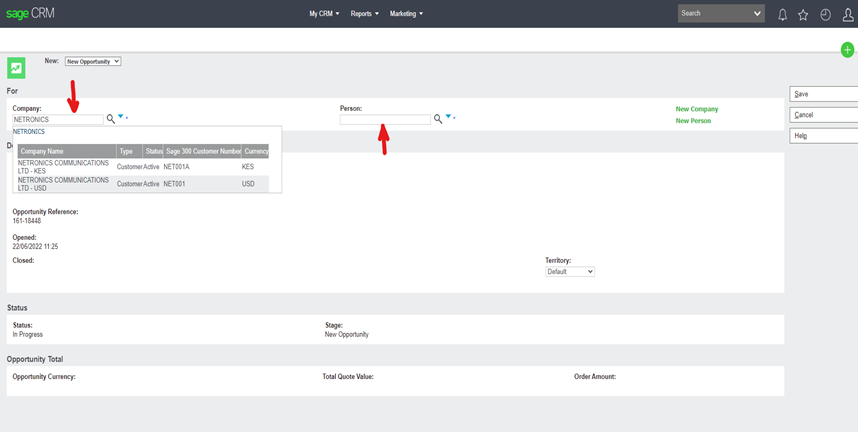
You can either use company name/account number or contact person to select partner. This information should be preloaded.
All fields with asterisk * must be completed before saving.
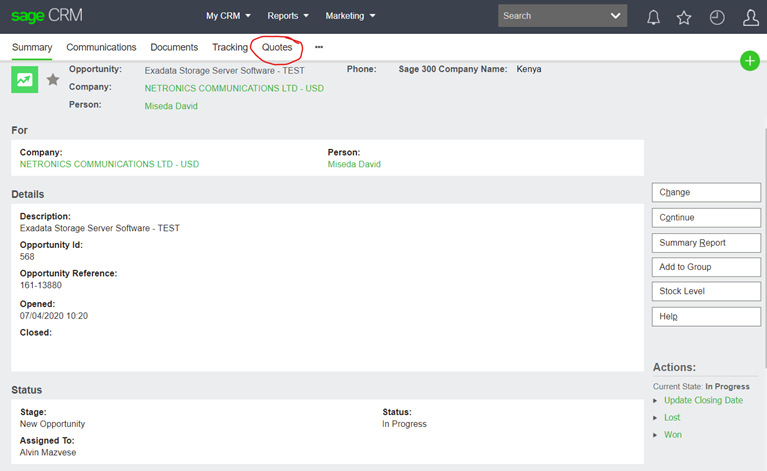
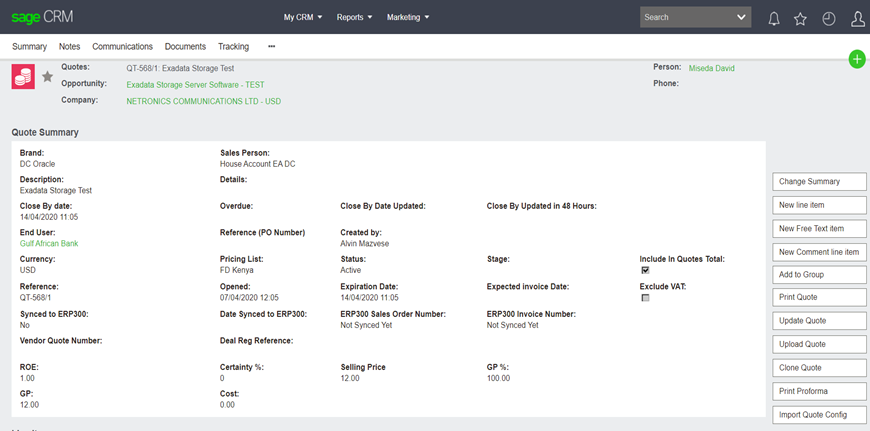
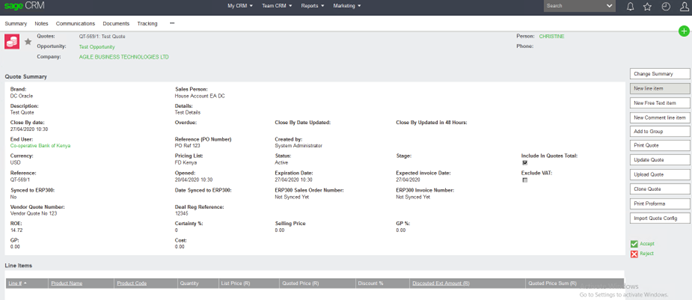
4. Create a new quote

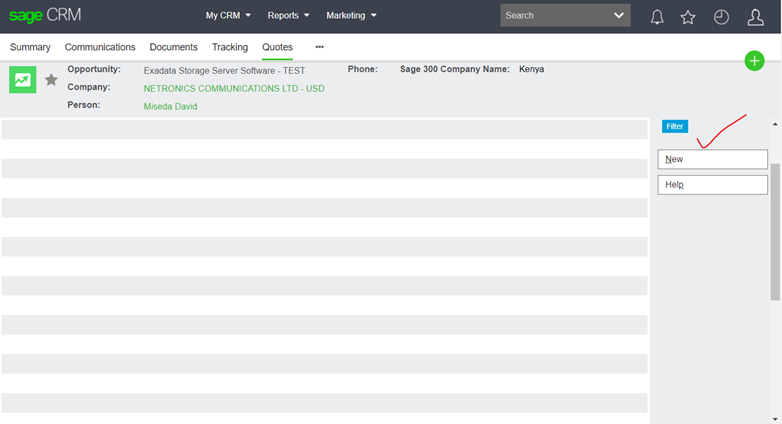
Click New to start a fresh quote and complete relevant details.
All fields with asterisk * must be completed before saving. Save with Next
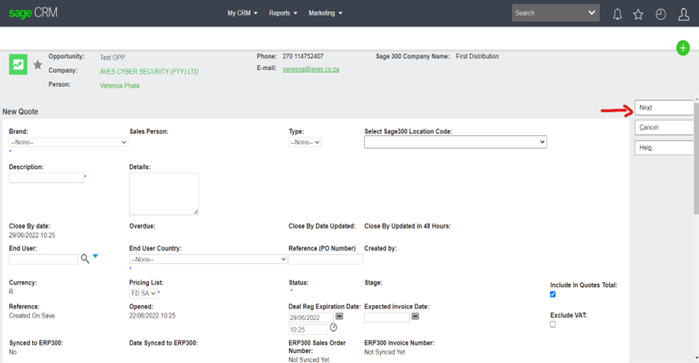
Set ROE to 1 for USD customer and >1 for other currencies
5. Adding products/Items to quote
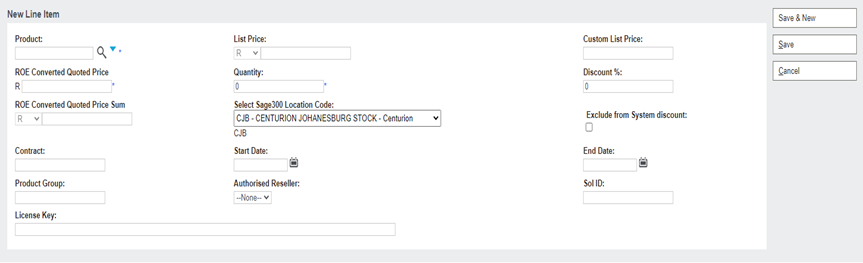
Select NEW Line Item
The following screen will appear where you will be able to select an item to be added to the quote:
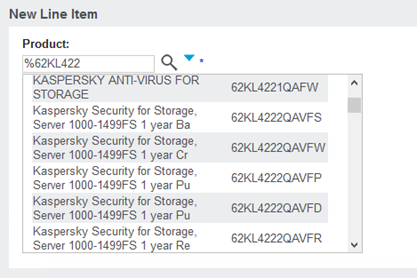
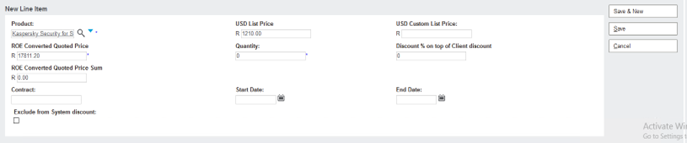
Select the product by typing in the SKU or the product name. Use the % sign as a wild card to assist in searching:
Once you select the product, list price will be retrieved from Accpac from a preloaded SKU module. The $ price will be calculated based on the ROE that was filled in on the Quote Header. (Please ignore the R sign on this screen, they will not appear on your quote template)
6. Adding product/Item with custom pricing
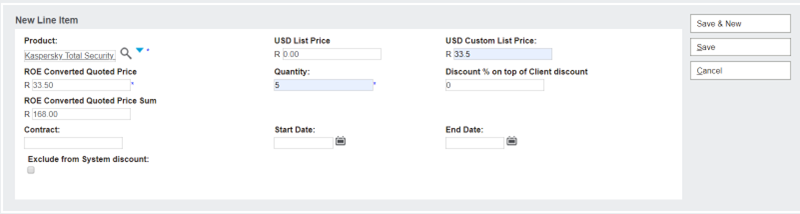
Pick a priceless SKU using the same method as above and complete the USD Custom List Price field with your own price.
You may choose to exclude preloaded partner discount and add your own on Discount % on top of Client discount.
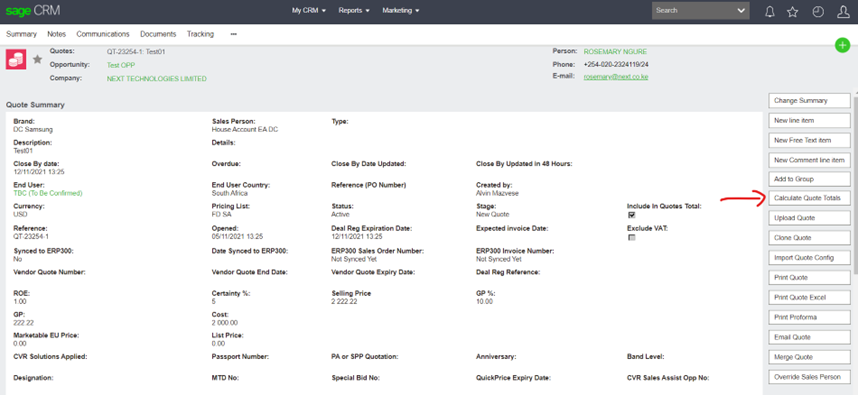
After saving the line item the following screen will be presented with the Quote Header at the top and the line items at the bottom.
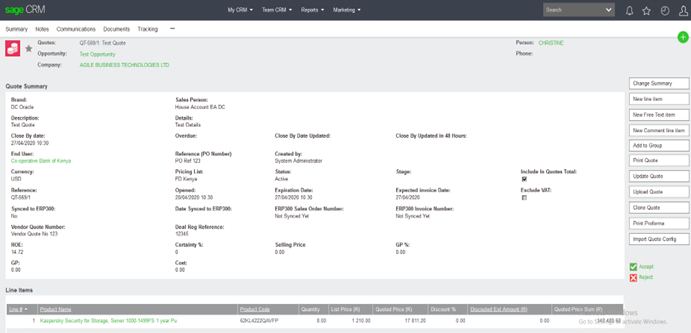
Click on the “Calculate Quote Totals” button when all the line items are added. This action will apply partner discount and any additional discount (if added) to each line item. Order Cost and GP will also be auto calculated.
When all items are added to the quote, click Accept to complete the workflow on the quote.
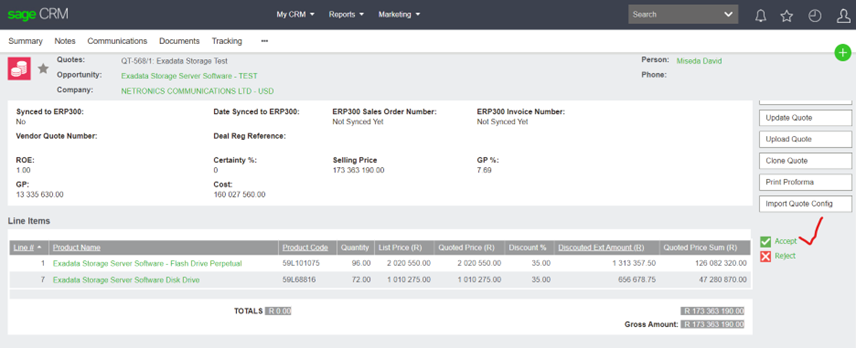
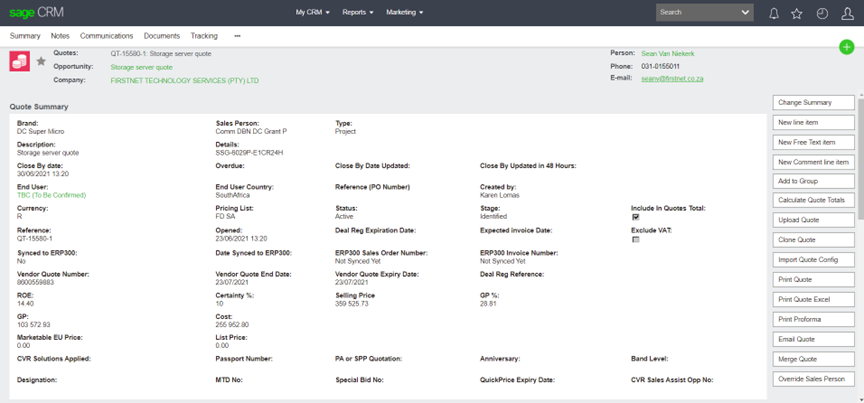
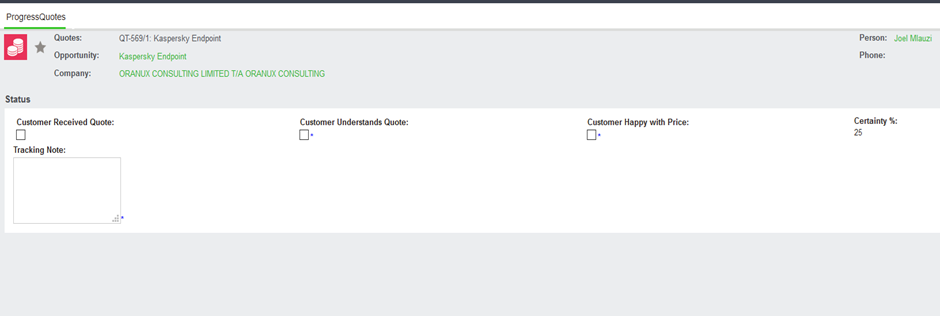
After the quote is accepted, check the quote, tick the below checkboxes and give a tracking note confirming that the end user and currency are correct.

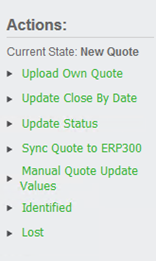
When Identifying check and tick the checkboxes and write a tracking note as below, which will also include an explanation for low margins or no margin, then attach the mail concerning the instructions.
Click Manual Quote Update values to enter your quote total vendor cost if it is not auto-calculated.
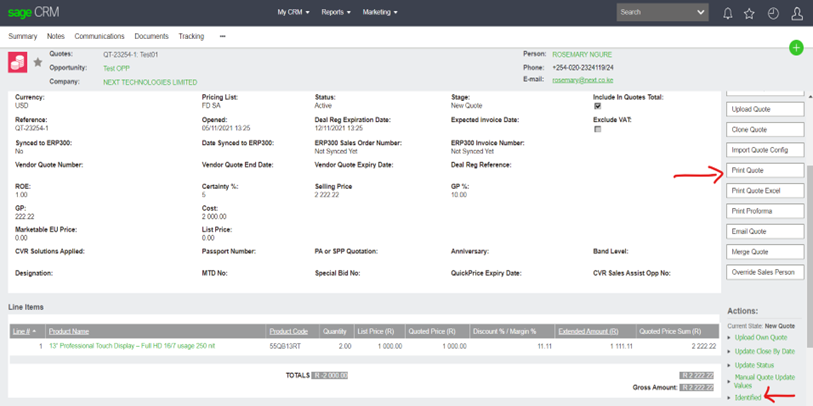
7. Print Quote/Proforma
You can print your documents by clicking on the “Print Quote” and Print Proforma buttons:
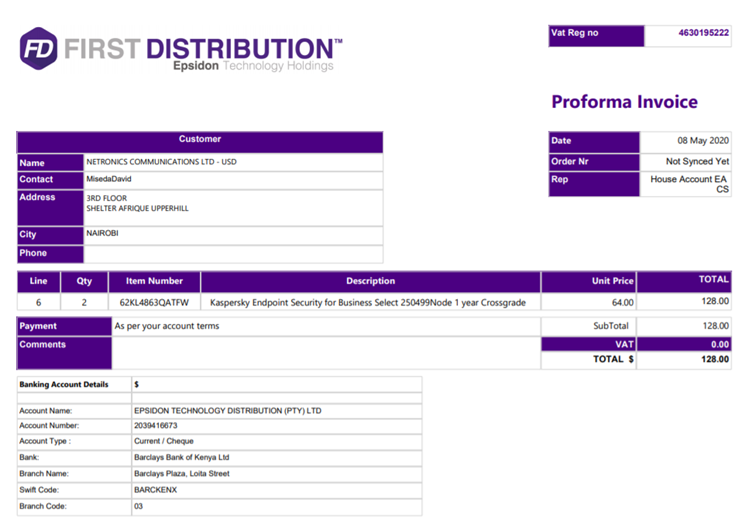
Please check all quote/proforma details before saving or downloading
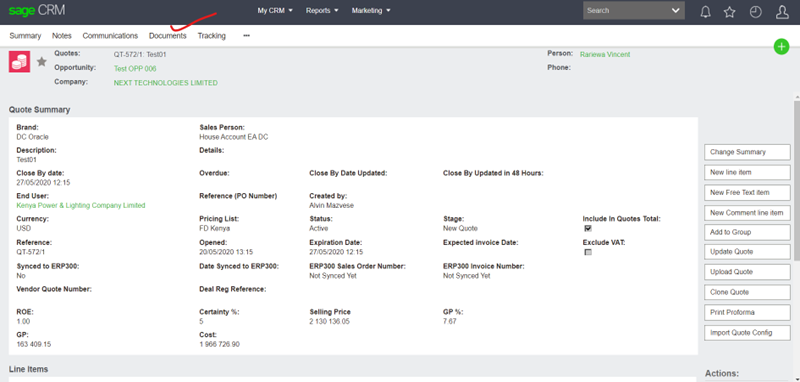
8. Quoting using the upload tool (Hardware)
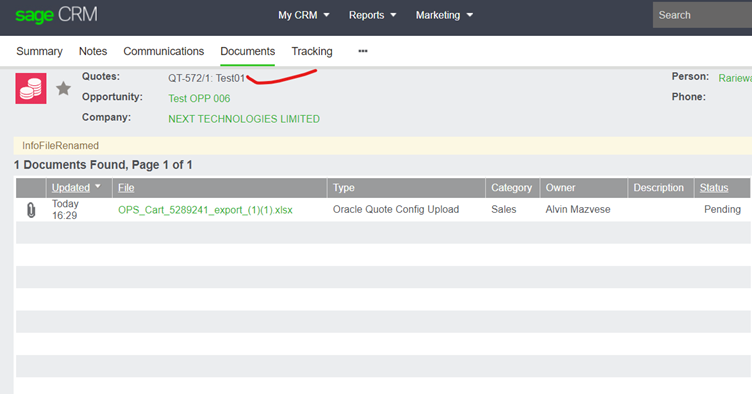
When Opportunity and Quote details are filled in (screen below) click on documents to upload your vendor cart. NB: Please ensure your cart is clean and all the information there is what you need on the client’s quote.
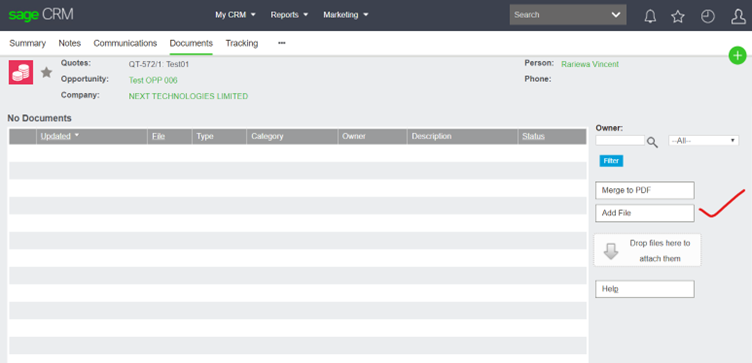
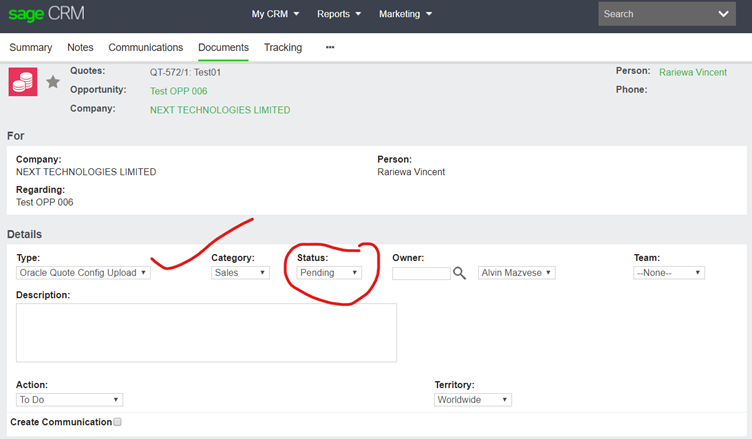
Add your cart file as illustrated below and save:
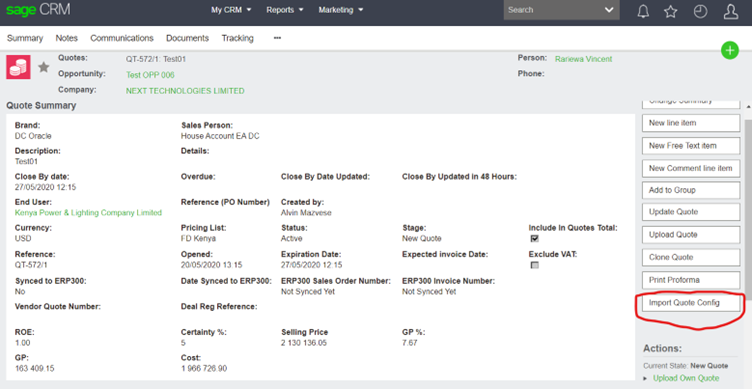
Use the Import Quote Config button to upload your items to the quote
Use Calculate quote Totals button to apply the discounts
Accept quote to enable workflow and printing options:
9. Sales Process
Sales will follow the sales workflow from here by validating, qualifying, and forecasting the deal. It is important to note that the workflow is now on the quote screen and no longer on the summary screen.
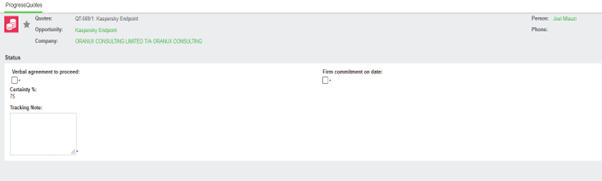
Validate (Please ensure you add a tracking note, it will not save without one)
Qualify (Please ensure you add a tracking note, will not save without one)
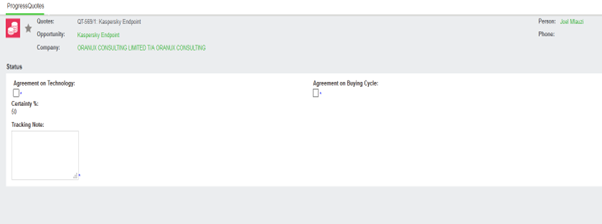
Forecast (Please ensure you add a tracking note, will not save without one)
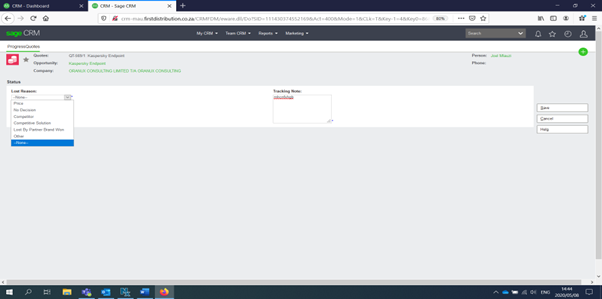
Should you lose a deal at any stage you can mark it as lost, select the relevant reason and provide a tracking note:
10. Sync Quote as order to Accpac
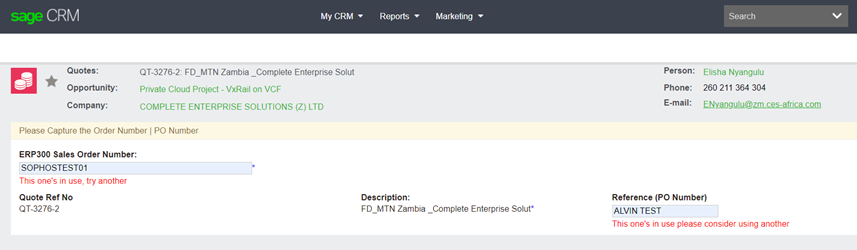
Once the client accepts the quote the “Sync Quote to ERP300” workflow step can be actioned.
![]()
This will add the quote to the Sync queue ready to be processed.
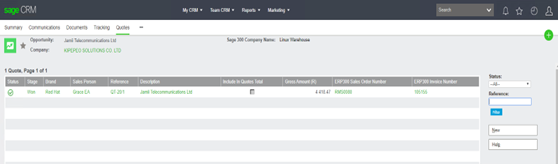
Once the sync process executes (+- 2 minutes delay) the quote will be updated with the relevant information from Accpac:

At this point, the Quote is successfully synced from CRM into Accpac as an Order:
When your order is Invoiced in Accapc, CRM will fetch the Invoice number then CLOSE the opportunity. Make sure all quotes not used is marked inactive.
DONE!
11. Dashboards
All dashboards still have the same look and feel
12. Reports
Click on Reports
Then select First Distribution Reports
Select Brand or Sales Report
